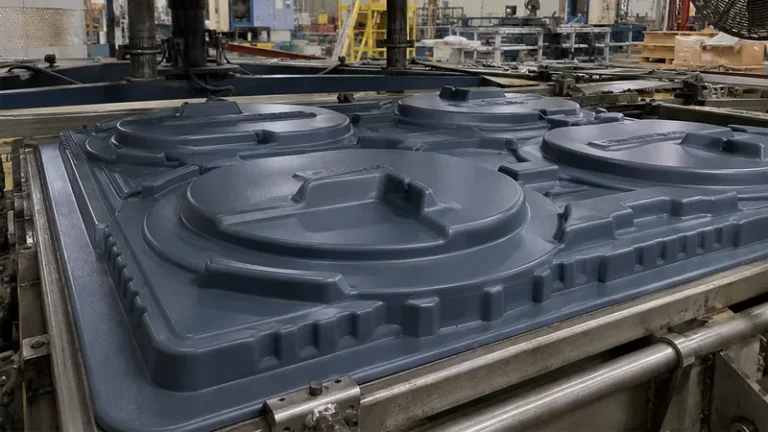
A forming tool is the most expensive reusable asset in a heavy-gauge thermoforming program, and often the one without a written care plan. Every cycle heats the mold, pulls sheet against it, and puts hands or hoists on it between runs. Quality complaints that look like process drift — thin corners, fuzzy texture, leaking seal areas — usually trace back to wear that a simple schedule would have caught. This article covers what drives tool wear, a maintenance routine that fits real production, the inspection intervals that matter, and the point where repair stops making economic sense. For process background, see the vacuum forming overview and this guide to heavy-gauge thermoforming.
- Mold service life is set by tool material, sheet abrasiveness, thermal cycling, and handling discipline — not by a fixed cycle count.
- Clogged vacuum vents and worn seal lands cause most dimensional drift and surface defects on formed parts.
- A per-run, weekly, and quarterly maintenance routine catches wear before it reaches validated parts.
- Tensile validation per ASTM D638 and scheduled dimensional audits confirm a tool still produces parts to specification.
- Refurbishment usually beats replacement until the forming surface is cracked, the frame is warped, or welds keep failing.
What Determines the Service Life of a Thermoforming Mold?
Mold life comes down to four variables: tool material and hardness, the abrasiveness of the sheet being formed, the number and severity of thermal cycles, and handling between runs. Two identical aluminum tools can differ by a factor of three in usable life on handling and storage discipline alone.
Tool material comes first. Machined aluminum tooling dominates heavy-gauge work because it moves heat quickly and is fast to modify, but softer alloys mark easily at the seal edge and around clamp frames. High-volume programs often add steel inserts at the surfaces that touch the sheet every cycle. Sheet selection matters just as much: glass-filled compounds such as PP/GF scrub a forming surface far faster than unfilled ABS or HDPE, so a tool that comfortably survives one hundred thousand cycles with unfilled sheet may need attention at half that figure with filled material.
Thermal cycling is the quiet variable. Every cycle expands and contracts the tool slightly; over thousands of cycles this works fasteners loose, opens seams in welded frames, and gradually warps flat sealing lands. Moisture trapped in porous cast tooling can drive pitting during repeated heating, which shows up on the part as a fine dimple pattern. A tool stored dry and covered between runs will outlast an identical one parked in a damp corner of the shop.
"A mold that passed first article inspection needs no further dimensional checks."False
First article approval only proves the tool was correct on that day. Thermal cycling, vent wear, and seal-edge erosion continue on every cycle after sign-off, so critical features can drift out of tolerance long before anyone re-measures. Ongoing checks are what keep a validated mold validated.
"Dimensional checks must continue at planned intervals after sign-off."True
A short re-measurement of critical features catches drift while it is still a polishing job. Waiting until assembly complaints arrive usually turns the same problem into welding and re-machining.
Material behavior gives a second reference point beyond geometry. ASTM D638 specifies the tensile test used to verify that incoming sheet and formed parts still carry the strength the design assumed; if a worn tool forces operators to run hotter sheet to fill corners, tensile data will show the loss before scrap rates explain it. Checking tensile strength on the same schedule as dimensions keeps both halves of validation honest.
A Maintenance Schedule That Fits Production Reality
The routines that actually get followed are built around three time frames: every run, every week, and every quarter. Per-run tasks take minutes: a visual pass over the forming surface for new scratches or dents, a blow-out of vacuum vents, a wipe of the seal lands, and a check that clamp-frame fasteners are still tight. Weekly work adds a vent flow check with cleaning pins1 and a closer look at gaskets and mounting. Quarterly work is where the tool comes off the machine for a full clean, a vent audit, and a dimensional spot check against the first-article record.
| Interval | Task | What it protects |
|---|---|---|
| Every run | Visual surface check, vent blow-out, wipe seal lands | Surface finish and clean release |
| Every run | Confirm clamp-frame fasteners are tight | Seal consistency and flash control |
| Weekly | Vent flow check with correctly sized pins | Wall uniformity in deep draws |
| Weekly | Inspect gaskets, platens, and tool mounting | Sealing quality and press alignment |
| Quarterly | Full clean, vent audit, dimensional spot check | Tolerance hold across the campaign |
Two habits extend tool life more than any product you can buy. First, respect the specified draft angle during any bench work; polished walls with worn draft hang up on release and pick up marks that look like mold damage2. Second, clean gently: plastic-safe scrapers and soft brushes remove residue without flattening surface texture, while wire brushes and aggressive solvents do a season of wear damage in one afternoon. Storage closes the loop — a tool should come off the press clean and dry, with vents taped against debris and sealing faces protected before it goes on the rack.
ZetarVac runs more than 20 vacuum forming machines processing sheet from 0.5 to 15 mm thick, so tools move between presses and product families. A written per-run checklist is what makes any mold safe to swap between machines without a new round of trial and error.
Which Wear Modes Shorten Vacuum Forming Tool Life?
Five wear modes account for most tool repairs: clogged or worn vacuum vents, eroded seal edges, scored forming surfaces, moisture pitting, and warped sealing lands. Each leaves a distinct symptom on the finished part, which makes tool condition readable from the parts themselves.
Clogged vents are the most common failure and the least dramatic. A vent in a deep-draw area plugs with residue, trapped air prevents full sheet contact, and the part shows thin or shiny spots exactly where the vent sits. Operators respond with hotter sheet and longer cycles, which quietly accelerates every other wear mode on the tool. Seal-edge wear shows up differently: flash at the trim line, inconsistent sealing in twin-sheet work, and webbing near the clamp frame.
Surface scoring and pitting come from handling and from the sheet itself. Contaminated or damp sheet can pit cast tooling; a slipped hoist strap can score an aluminum surface in one motion. Pressure forming, which adds air pressure on top of vacuum to push sheet into fine texture, speeds up surface wear because the sheet is pressed harder against every detail, so textured pressure-forming tools need more frequent surface audits than straight vacuum tools.
"If the forming surface looks clean, the vents are working fine."False
Vents plug from the inside where a visual check cannot reach, and a blocked vent produces a subtle shiny patch rather than an obvious defect. By the time the symptom is unmistakable, several runs have already shipped with wall-thickness variation. Flow checks with correctly sized cleaning pins are the only reliable test.
"Vent condition needs a scheduled flow check, not just a visual wipe."True
A five-minute flow verification per vent group catches blockage before it reaches the part. The record also shows whether a tool’s vent pattern is wearing evenly or whether one region needs re-drilling.
Whatever the wear mode, write the finding down against the tool number and cycle count. Industry groups such as the SPE Thermoforming Division publish maintenance and troubleshooting guidance that makes a useful baseline for building that log.
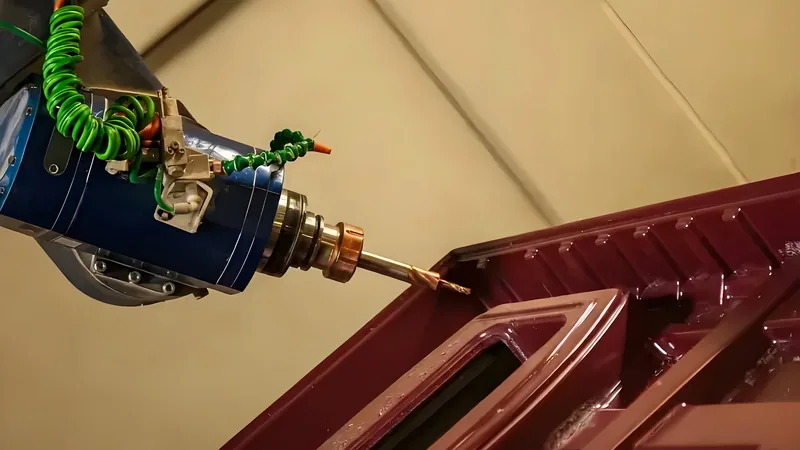
Formed parts are trimmed on a 5-axis CNC centre that follows the forming tool, so any rework that changes mold geometry must be mirrored in the trim program. Logging every tool modification is what keeps forming and trimming in step.
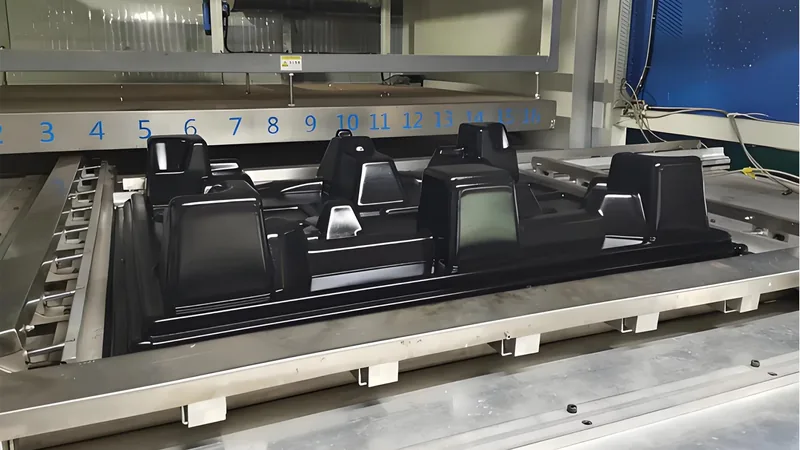
How Often Should You Inspect and Refurbish a Forming Tool?
Inspect the forming surface and seal lands at every tool change, audit critical dimensions against the first-article record every 10,000 to 25,000 cycles, and review the tool for refurbishment at least once a year. Tools running abrasive filled sheet belong at the short end of those intervals.
The cycle count that triggers an audit is not universal. Unfilled ABS or HDPE parts let a tool run to the long end of the range; glass-filled and stiff engineering sheet pull it toward the short end. An audit should include a CMM check3 of the features that drive assembly, a flatness check on the sealing lands, a vent flow verification, and a surface comparison against photographs taken at first article.
Refurbishment is triggered by symptoms rather than by the calendar: parts that need rework to fit, seal flash that cleaning does not fix, vent witness marks that reappear after pinning, or surface texture visibly flattened in high-wear zones. Catching any one of these early usually means a bench job measured in days; catching them late means welding, re-machining, and re-qualification measured in weeks.
A useful tool record is short but consistent: tool number, machine, material and sheet gauge, cycle count at each check, findings, actions taken, and photographs. When that record travels with the mold, a refurbishment quote comes back in days instead of weeks, because the molder is not reverse-engineering the tool’s history. Tools that arrive with no records are quoted conservatively, and the customer pays for that uncertainty.
Repair, Refurbish, or Replace: Making the Call
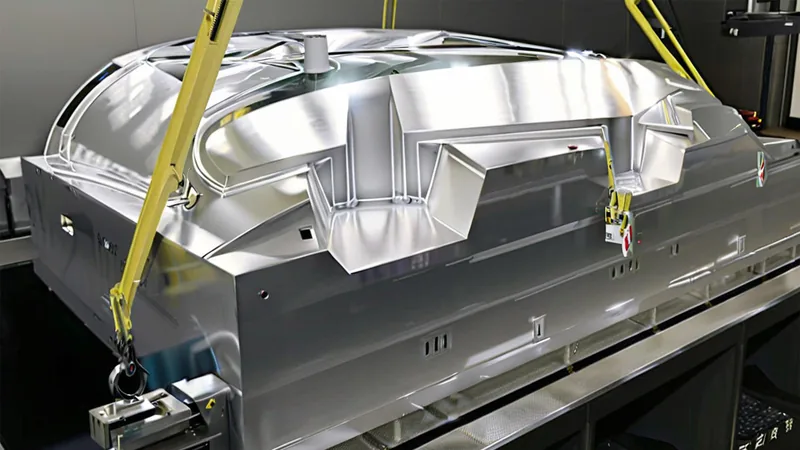
Three questions settle most repair decisions. First, is the damage local or structural? A worn land or a plugged vent field is local and repairable; a cracked frame or a warped base is structural and rarely worth fixing twice. Second, how many times has the same area been repaired? A seal edge re-welded twice will usually fail a third time, and each repair adds a small geometry change that trimming and assembly must absorb.
Third, has the part design moved on? If a design review of the part suggests changes to draft, texture, or vent layout, rebuilding around the old geometry wastes money; the DFM checklist for thermoformed parts and molds is a practical screening tool before committing to a refurbishment.
ZetarVac supports prototyping, small batch and large batch production on the same tooling base, with reference monthly capacity of roughly 100,000 to 200,000 pieces. A maintenance record that travels with the mold is what keeps part quality consistent across that volume range.
FAQ: Mold Maintenance and Service Life
How long does a heavy-gauge thermoforming mold actually last?
There is no fixed number, and anyone who quotes one without seeing the material and handling conditions is guessing. With disciplined maintenance, aluminum heavy-gauge tooling commonly serves for years and hundreds of thousands of cycles; abrasive filled sheet, poor storage, or mishandling can cut that sharply. Maintenance discipline predicts life better than the build date does.
Can I clean vacuum vents without damaging the mold?
Yes, if the cleaning pins match the original vent diameter and you never enlarge a vent to restore flow. A vent that grows even slightly leaves a visible witness mark on every part and changes local wall thickness. Persistent blockage should be drilled out and re-plugged at the correct size, not opened up.
Does mold maintenance affect part certifications?
Yes. UL 94 classifies the flammability of plastic materials and is required for many equipment enclosures, and it depends on wall sections staying inside the range validated at first article — precisely what a worn tool puts at risk4. Heat performance follows the same logic: the HDT value a material is rated for assumes the formed wall thickness the design specified5.
What should I send a molder when asking about a tool’s remaining life?
Send the cycle count, the original tool drawing, the most recent dimensional report, and a clear description of current symptoms, ideally with photographs. A molder can estimate remaining life and refurbishment scope from those four items in a single review.
Who owns mold maintenance, the customer or the molder?
It depends on the tooling agreement, which is exactly why ownership should be written down before the tool is built. The contract should state who performs scheduled maintenance, who pays for refurbishment, and what documentation transfers with the tool if production ever moves.
If you are comparing suppliers or reviewing an aging tool at the evaluation stage, share your drawings and the maintenance history, and talk to an engineer about expected service life for your material and volume. Start at the ZetarVac vacuum forming manufacturer page or the service overview.
-
Vacuum vent: A small hole in the forming surface that evacuates trapped air during forming; plugged vents cause thin or shiny spots in deep draws. ↩
-
Draft angle: The slight taper designed into vertical mold walls so a formed part releases cleanly; loss of draft through wear or rework causes release marks and hang-up. ↩
-
CMM: Coordinate measuring machine, the standard equipment for verifying formed part dimensions against the first-article record. ↩
-
UL 94: A flammability classification standard for plastic materials, required for many equipment enclosures and housings. ↩
-
HDT: Heat deflection temperature, the temperature at which a plastic specimen deflects a specified amount under flexural load, indicating short-term heat resistance. ↩