Webbing and bridging decide whether a deep-draw heavy gauge part ships on time or goes back to the process bench. Webbing is excess sheet that folds onto itself between two close features; bridging is sheet that spans a cavity or boss without fully contacting the tool. Both look cosmetic at first, but both thin the wall exactly where the part needs strength. This guide covers why each defect forms on thermoformed parts, which process and tooling variables control them, and how to verify a fix before committing to production. For a process overview, start with the vacuum forming guide.
- Webbing and bridging are material-distribution failures, not surface blemishes: the affected zone is thinned, and that is where formed parts crack or fail a seal in service.
- Sheet temperature is the first variable to correct. Overheated sheet keeps folding between features; cold sheet freezes before it conforms and bridges instead.
- Draw ratio predicts risk before tooling is cut. Deep pockets, close ribs, and tall bosses all raise it.
- Correct process settings first and tooling second. Plug, vacuum hole, and temperature rework costs far less than new tooling.
- Acceptance must include wall-thickness measurement in the webbed and bridged zones, not just a visual check of the trimmed outline.
What Are Webbing and Bridging in Heavy Gauge Thermoforming?
In vacuum forming, the heated sheet is drawn against a single-surface tool by vacuum, so it must stretch to cover every feature. Webbing appears when unsupported sheet between two close features, such as twin pockets or a recessed handle, collapses and folds onto itself, leaving a thick double-layer crease. Bridging appears when the sheet spans a large cavity or two raised bosses and solidifies before it pulls down fully, leaving a flat, often glossy, zone with a thin wall underneath.
Both defects are geometric symptoms of the same physics: hot sheet always takes the shortest path it can, and wherever tool geometry or process settings let it take a shortcut, material collects in the wrong place. A webbed crease can hold several times the nominal wall thickness while the adjacent wall drops well below nominal. That is why the defect matters for strength, flange sealing, and mating hardware, not just appearance. The full family of forming defects is covered in the heavy gauge thermoforming defects guide.
ZetarVac processes sheet from 0.5 to 15 mm on more than 20 vacuum forming machines, with a maximum forming length of about 2,500 mm. That envelope covers the deep-draw housings and trays where webbing and bridging are most likely, so these defects are treated as process-engineering items from the first prototype rather than cosmetic punch-list items at shipment.
Why Do Webbing and Bridging Form on Deep-Draw Parts?
They form because hot sheet takes the shortest path between two anchored contact points, and deep, closely spaced, or steep features hand it shortcuts. When the draw is deeper than the sheet can stretch evenly, unsupported zones fold into webs; when the sheet cools below its forming range before reaching a cavity floor, it bridges instead of conforming.
Three geometry-driven mechanisms dominate in heavy gauge work. First, draw ratio1, which compares formed area to starting sheet area; as it climbs past what the material can thin evenly, the surplus folds. Second, feature spacing: gaps narrower than roughly the sheet thickness plus draft allowance tend to capture the sheet between two walls and form a web. Third, contact sequencing: without plug assist2, the sheet sticks wherever it touches the tool first, so tall central bosses steal material from the corners that still need it.
Sheet temperature sits behind all three mechanisms. A sheet entering the forming station above its ideal window keeps stretching after first contact, so thin zones keep thinning and unsupported spans keep folding. A sheet below the window stiffens too early, and that stiffness is exactly what makes it bridge across a cavity instead of draping into it.
"Webbing means the mold was designed wrong and only a new tool can fix it."False
Most webs trace back to sheet temperature, pre-stretch depth, or vacuum timing, all of which the process can change within a shift. Reworking a plug or adding vacuum zones costs a fraction of new tooling. Blaming the mold first usually delays a cheap process fix.
"Most webbing can be removed by process adjustments before any tooling change."True
Lowering sheet temperature, reducing pre-stretch, and resequencing vacuum removes the majority of webs on deep-draw parts. Only when those levers are exhausted does geometry need to change. Working in this order also documents a repeatable process window for production.
How Do Sheet Temperature and Material Choice Change the Outcome?
Sheet temperature sets how far and how evenly the sheet can stretch, and every material has a window where webbing risk is lowest. Run too hot and the sheet folds between features; run too cold and it bridges across them. Material selection moves that window and changes how forgiving it is.
The ranges below are engineering starting points for heavy gauge work; the working window depends on sheet gauge, oven type, and machine, and should be confirmed on your own tooling.
| Material | Typical sheet forming range | Webbing tendency | Practical note |
|---|---|---|---|
| ABS | ~130–170 °C | Moderate | Most forgiving common grade for deep draws |
| PC/ABS | ~140–180 °C | Moderate | Standard for equipment housings; watch hot strength |
| PC | ~170–210 °C | Higher | Stiff when hot; needs plug assist on deep draws |
| HDPE | ~140–170 °C | High | Low hot strength; webs easily between close features |
| PP | ~150–180 °C | High | Narrow window; sag control matters most |
| PMMA | ~140–170 °C | Moderate | Brittle when cold-formed; keep edges fully heated |
Heat deflection temperature3 is the property that best predicts how much hot strength a sheet keeps while it stretches, so it is worth comparing across candidate grades before committing to a deep draw.
Two checks matter once a fix is in place. ISO 527-2 specifies the tensile test used to verify that both the raw sheet and the formed part keep the strength the design assumes, and it is the right validation after any webbing correction because a webbed corner concentrates tensile loads in a thinned section. For formed equipment housings and covers, UL 944 defines the flammability ratings the material must satisfy, and a thick webbed crease can change how a flame-retardant grade behaves at a sharp fold, so the rating is confirmed on the formed part rather than only on the sheet certificate.
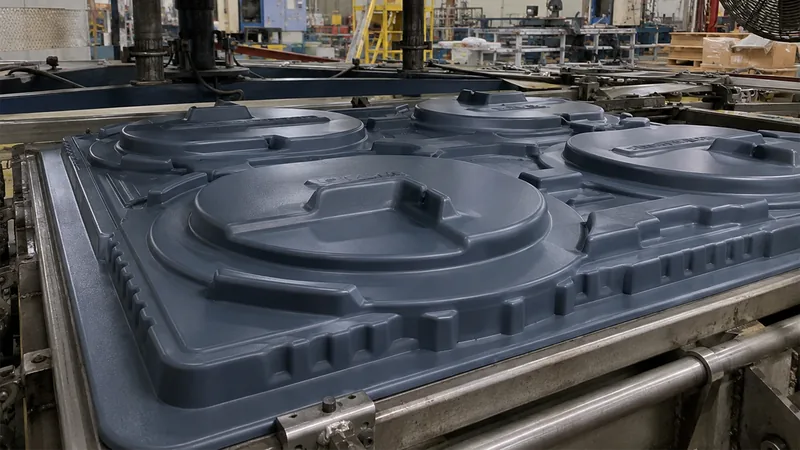
The ZetarVac material library covers ABS, PC, PC/ABS, HDPE, PP, PMMA, ASA and other engineering grades, matched to applications from automotive interiors to equipment housings. When a design is webbing-prone, choosing a grade with a wider forming window, such as ABS or PC/ABS instead of a narrow-window polyolefin, is often the cheapest correction available.
Which Tooling and Vacuum Changes Remove Webbing?
The highest-yield tooling fixes are plug assist, vacuum hole layout, and feature spacing. A plug pre-stretches the sheet exactly where vacuum alone cannot pull it evenly, and repositioning or reshaping a plug is the standard cure for webs that a temperature change cannot remove.
Vacuum design matters just as much. On deep draws, vacuum holes should concentrate at the last-filled zones: cavity corners, rib bottoms, and the far side of tall bosses. Holes that are too small or too few slow the pull and invite bridging, while holes on cosmetic surfaces leave witness marks, so their placement is a deliberate trade. Where fine texture or sharp detail competes with webbing control, pressure forming applies positive air pressure on the sheet side and gives the process another lever.
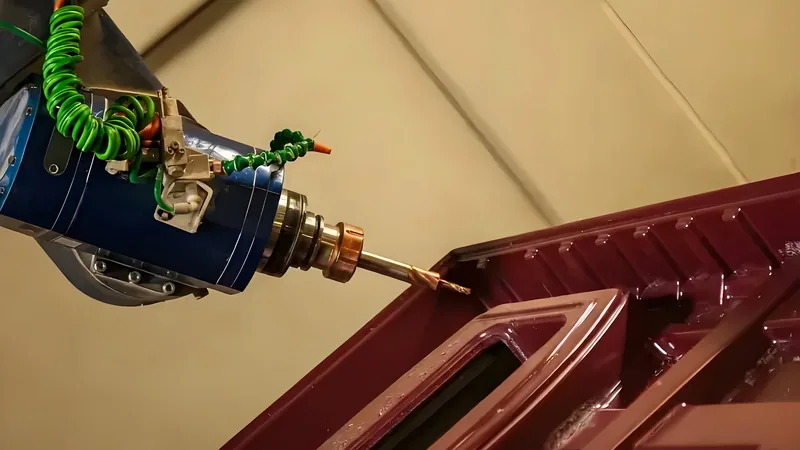
Use the table below to move from symptom to first correction without guessing.
| Symptom | Most likely cause | First correction | Verify by |
|---|---|---|---|
| Web between two pockets | Sheet too hot or features too close | Drop sheet temperature 10–15 °C; add draft or increase spacing | Cut the web zone and measure wall thickness |
| Flat bridge across a cavity | Sheet too cold or vacuum too slow | Raise sheet temperature; enlarge or add holes at the cavity edge | Marker contact check against the tool surface |
| Web at flange corners | Pre-stretch too deep | Reduce billow height or add plug assist | Trim-and-fit check on the mating flange |
| Thin corner beside a thick web | Boss draws material too early | Reshape or reposition the plug; resequence vacuum | Thickness map across the corner |
Industry groups such as the SPE Thermoforming Division publish troubleshooting guidance for this stage of process development, and the specific sequence used to prevent webbing is described in more detail in our webbing prevention article.
How Do You Inspect and Accept a Formed Part?
Inspect the webbed and bridged zones directly: measure wall thickness by sectioning or ultrasonic gauging, check tool contact, and repeat after any process or sheet-lot change. A visually clean surface does not prove the wall is correct underneath it.
A practical acceptance routine has three layers. First, map thickness across every zone where a web or bridge appeared during development, and compare against the minimum wall the design requires. Second, verify mating features: a flange that sealed on the prototype can leak after a process drift moves material elsewhere. Third, sample across time, because webbing follows sheet-lot and ambient drift. For covers specified against IEC 60529, which defines the IP code5 classifying enclosure sealing against solids and liquids, a bridged or thinned flange can fail the sealing test even when the part looks dimensionally acceptable.
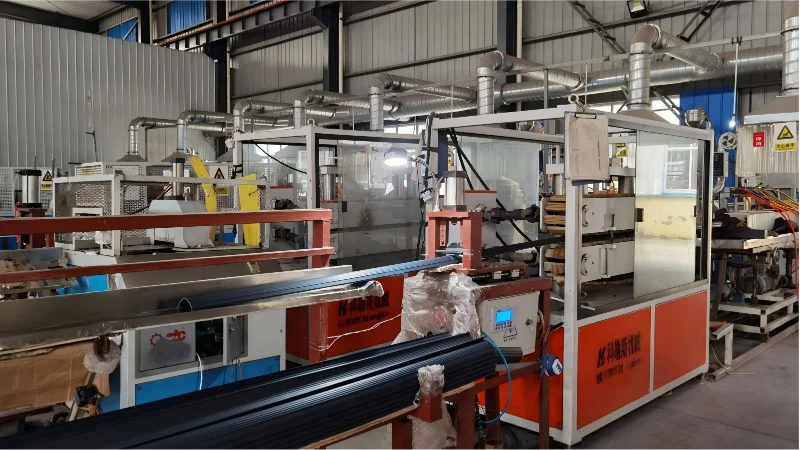
Formed parts at ZetarVac are trimmed on a 5-axis CNC centre, so the trimmed outline follows the forming tool. When a webbing fix slightly changes the formed geometry, the trim program is updated from the same tool definition, which keeps flanges and mounting holes consistent between the approved sample and production parts.
Sampling cost is trivial compared with the cost of a rejected enclosure batch: a thickness gauge, a cut check, and fifteen minutes per sample catch what visual inspection misses. Document the readings, because they become the reference for every future lot.
"A clean first article proves webbing will not appear during the production run."False
Sheet lots, oven zones, and ambient conditions drift across a run, and webbing follows those drifts. One clean sample only proves that setting worked once. Approval should include parts sampled across the sheet lot and the run.
"First-article approval should be repeated after any sheet lot or process change."True
Temperature windows shift with new sheet lots and seasonal ambient changes, so re-checking the webbed zones protects the run. A short thickness check on sampled parts catches drift before scrap accumulates. This is routine practice for formed enclosures and trays.
FAQ
Can webbing be fixed without changing the mold?
Usually yes. Sheet temperature, pre-stretch depth, forming speed, and vacuum timing remove the majority of webs, which is why process adjustment should always come before tooling rework. Tooling changes are the second step, not the first.
Does thicker sheet eliminate bridging?
No. Thicker sheet carries more mass and often bridges more readily, because it stiffens and resists draping into deep corners. Bridging is corrected with temperature, vacuum layout, and plug design, not by moving up a gauge.
Which materials are most prone to webbing?
Low hot-strength polyolefins such as HDPE and PP web most easily, especially between closely spaced features. PC also demands care because it is stiff when hot. ABS and PC/ABS offer the most forgiving windows for deep-draw heavy gauge parts.
How many parts should I check before approving a run?
Check the first article, then sample parts from the beginning, middle, and end of the first sheet lot, measuring thickness in every zone where webbing or bridging appeared during development. Repeat the sampling whenever the sheet lot or a process setting changes.
Where can I get my part reviewed for webbing risk?
Bring the drawing and the application loads, and compare the draw ratio and forming window with a forming engineer before tooling is committed. You can send your drawings through ZetarVac’s vacuum forming manufacturing page or review the full service scope to talk to an engineer about your part.
-
Draw ratio: The ratio of formed surface area to original sheet area in a given zone; higher draw ratios mean more thinning and higher webbing risk. ↩
-
Plug assist: A mechanically driven helper plug that pre-stretches the hot sheet before vacuum pulls it onto the tool, improving wall distribution on deep draws. ↩
-
HDT: Heat deflection temperature, the temperature at which a standard specimen deflects a specified amount under a defined flexural load. ↩
-
UL 94: The flammability standard that classifies how plastic materials burn, widely required for electrical equipment enclosures and covers. ↩
-
IP code: The ingress protection rating defined by IEC 60529, classifying how well an enclosure seals against solids and liquids. ↩