Introduction
In the realm of modern manufacturing, where ingenuity and technology converge, vacuum forming emerges as a versatile artisanal process that shapes the future. This introductory chapter opens the curtain to the world of vacuum forming, unveiling its essence, significance, and the delicate dance of precision that underpins its very core.
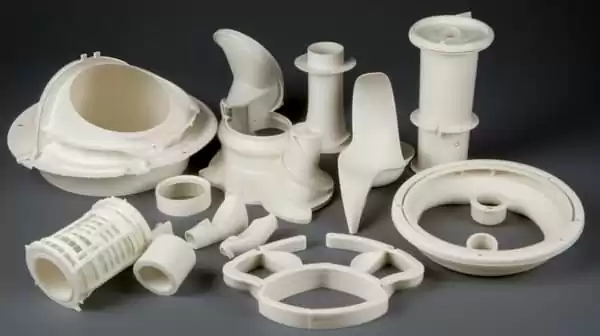
Imagine a blank canvas, patiently waiting for the artist's brushstrokes to give it life. In much the same way, vacuum forming transforms flat plastic sheet into intricate three-dimensional shapes, breathing existence into a myriad of products. From protective packaging trays cradling delicate electronics to automotive interior components enhancing comfort and aesthetics, thinner sheet vacuum pressure forming weaves its magic across a diverse spectrum of plastic part applications.
Importance of Thickness Measurement in Vacuum Forming
Imagine a protective packaging tray that is just a fraction too thin, compromising its ability to shield its contents effectively. Conversely, picture an automotive panel that is slightly too thick, causing discomfort or structural concerns. In both scenarios, the thickness of the vacuum-formed part is not just a mere detail but a decisive factor in its performance and functionality.
Accurate thickness measurement is the compass that guides manufacturers towards the optimal material density required for a specific application. It ensures that each vacuum-formed part is tailored to exact specifications, meeting both design draft angles requirements and performance expectations. Moreover, precise thickness measurement contributes to the overall quality, durability, and reliability of the final product.
Preview of the Methods and Considerations for Determining Thickness
In the quest for precision, an array of methods and considerations come into play when determining the thickness of vacuum-formed parts. This article delves into the world of thickness measurement, unraveling techniques and insights that elevate the vacuum forming process. From the straightforward use of calipers and micrometers to the intricacies of ultrasonic thickness gauges and optical profilometers, we will explore the tools that empower manufacturers to ascertain thickness with confidence.
Beyond the instruments, we will venture into the realm of material variability, understanding how factors like temperature and vacuum pumpressure impact wall thickness measurements. We'll unravel the intricate relationship between part design and measurement, navigating the challenges posed by varying wall thicknesses, sharp corners, and other design intricacies.
Furthermore, we will shed light on the crucial aspect of equipment accuracy and calibration—highlighting the steps to ensure that measurement tools are finely tuned to provide reliable results. By the end of this journey, you'll be equipped with the knowledge and insights needed to make informed decisions, ensuring that the thickness of your vacuum-formed parts aligns seamlessly with your vision of excellence.
Join us as we delve into the heart of thickness measurement in vacuum forming, uncovering the methodologies and considerations that underpin the art of precision manufacturing.
II. Importance of Accurate Thickness Measurement
In the intricate dance of manufacturing, precision reigns supreme. Accurate thickness measurement in vacuum forming emerges as a silent but powerful conductor, orchestrating a symphony of structural integrity, functionality, and design perfection. As we delve deeper into the realm of thickness measurement, the true significance of this seemingly minute detail comes to light.
A. Significance of Thickness in Structural Integrity and Functionality
Imagine constructing a building without ensuring the right thickness of its foundation. Much like that cornerstone, the thickness of a vacuum-formed part serves as the bedrock upon which its entire existence is built. It determines whether the part can endure the stresses it will inevitably encounter in its intended environment.
Structural integrity hinges on the precise thickness of the material. It ensures that the part can bear the load, withstand external forces, and fulfill its purpose without faltering. Whether it's a packaging tray safeguarding delicate electronics or a dashboard panel enhancing the interior aesthetics of a car, the right thickness is the unsung hero that guarantees performance and reliability.
B. Effects of Incorrect Thickness on Part Performance
Deviation from the optimal thickness range is akin to introducing dissonance into a harmonious melody. Just as a misplaced note disrupts the rhythm of a composition, an incorrectly measured thickness disrupts the seamless functionality of a vacuum-formed part. The consequences reverberate far beyond the manufacturing floor.
If a part is too thin, it becomes vulnerable to stress-induced deformities, buckling under pressure. Conversely, excessive thickness can lead to unnecessary weight and rigidity, compromising the part's efficiency and ease of use. From compromised aesthetics to diminished durability, the effects of incorrect thickness ripple through the entire lifecycle of the product.
C. Role of Accurate Measurements in Meeting Design Specifications
Design is the blueprint upon which reality is sculpted. Accurate measurements are the chisel that ensures each contour, each detail, aligns precisely with the intended vision. Whether it's a product's sleek form or its functional intricacies, accurate thickness measurement is the linchpin that translates design specifications into tangible reality.
Meeting design specifications isn't a mere checkbox on a manufacturing to-do list; it's a commitment to excellence. Accurate thickness measurements transform design intent into tangible outcomes, ensuring that the final product resonates with the designer's vision and the end user's expectations.
As we navigate the labyrinthine path of vacuum forming, the importance of accurate thickness measurement emerges as a beacon guiding us towards a realm of flawless functionality, impeccable design, and enduring quality. In the next section, we'll journey through the methods that breathe life into this critical aspect of the manufacturing process.
III. Methods for Measuring Thickness
In the intricate tapestry of vacuum forming, the measurement of thickness stands as a linchpin between concept and creation. A meticulous understanding of the methods employed to measure this seemingly simple attribute reveals a world of precision and innovation. Let us embark on a journey through the diverse techniques that underpin the art of thickness measurement.
A. Overview of Various Measurement Techniques
The pursuit of accurate thickness measurement is a tapestry woven from diverse threads of scientific ingenuity. Each technique represents a unique approach, catering to the intricacies of different materials, shapes, and manufacturing environments. These techniques, when masterfully employed, ensure that the final product meets the highest standards of quality and functionality.
B. Detailed Explanation of Each Method
1. Calipers or Micrometers:
The venerable caliper and micrometer, stalwarts of precision measurement, offer a straightforward yet effective means of gauging thickness. By delicately embracing the vacuum-formed part and measuring its width, these tools unveil the material's thickness at the designated point. Ideal for simplicity and speed, calipers and micrometers provide instant feedback starting thickness throughout, making them a favored choice for quick assessments.
2. Ultrasonic Thickness Gauges:
Step into the realm of modern technology with ultrasonic thickness gauges. These devices emit high-frequency sound waves that travel through the material and bounce back upon encountering the opposing surface. By measuring the time taken for this sonic journey, ultrasonic thickness gauges provide a non-invasive and highly accurate measurement, even in cases where direct access to the part may be limited.
3. Optical Profilometers:
Behold the marriage of light and precision in optical profilometers. These instruments harness the principles of light interference patterns to create intricate 3D images of the vacuum-formed part's surface. By analyzing these images, optical profilometers unveil not only the thickness but also intricate details, enabling a holistic understanding of the material's form and structure.
4. Cross-Sectional Analysis:
For those seeking the utmost depth and detail, cross-sectional analysis emerges as a powerful tool. This method involves delicately extracting a sample section from the vacuum-formed part and subjecting it to microscopic examination. The magnifying lens of the microscope reveals the material's thickness with unparalleled precision, enabling a level of insight that transcends the surface.
In the grand tapestry of vacuum forming, these methods intertwine to provide a comprehensive understanding of thickness. Each technique, a testament to human ingenuity, ensures that the vacuum-formed part adheres faithfully to its intended design, contributing to a harmonious fusion of art and science. As we venture forth, let us unravel the complexities of material variability and its intriguing dance with measurement accuracy.
IV. Choosing the Right Method for Your Application
As the curtain rises on the stage of thickness measurement in vacuum forming, the spotlight now turns to the critical decision of selecting the most fitting measurement method. Like a conductor orchestrating a symphony, this choice harmonizes the nuances of material, design, and functionality. Let us delve into the factors that sway this pivotal decision.
A. Factors Influencing the Choice of Measurement Method
In the vast expanse of manufacturing, no two applications are identical. The choice of a measurement method is an intricate dance that responds to the unique cadence of each project. Factors that wield influence include the material's properties, the part's geometry, and the desired level of accuracy. Beyond these technical considerations, practical constraints such as budget, time, and available equipment also guide the path.
B. Comparing the Advantages and Limitations of Each Technique
To navigate this labyrinth of choices, let us unfurl the tapestry of advantages and limitations that each technique presents.
Calipers or Micrometers:
Advantages: Simplicity, speed, immediate feedback. Limitations: Limited accuracy for thin parts, potential user-dependent variability.
Ultrasonic Thickness Gauges:
Advantages: Non-invasive, accurate, suitable for various materials. Limitations: Requires direct access to the surface, sensitive to surface conditions.
Optical Profilometers:
Advantages: Detailed 3D imaging, captures intricate surface features. Limitations: Equipment cost, complexity, sensitivity to reflective surfaces.
Cross-Sectional Analysis:
Advantages: Unparalleled precision, in-depth insight. Limitations: Destructive, time-consuming, specialized equipment required.
C. Considerations Based on Part Complexity and Material Characteristics
Like a skilled conductor selecting instruments for a symphony, the choice of measurement method is a symphony of its own. For complex parts with intricate geometries, optical profilometers may be the virtuosos, capturing every detail. Ultrasonic thickness gauges, with their ability to penetrate diverse materials, offer their resonance to parts of varied composition.
Material characteristics play their own tune—a homogeneous material may find resonance with calipers or micrometers, while a layered composite may harmonize with the depth of cross-sectional analysis.
As you stand at this crossroads of choice, consider the soul of your project—the part's design, the material's essence, and the symphony of manufacturing constraints. Allow these considerations to guide your hand as you select the measurement method that will lend its unique voice to your vacuum forming masterpiece.
In the next act, we unravel the tapestry of material variability—a symphony of temperature, pressure, and dynamic interaction that breathes life into the measurement process.
V. Executing Accurate Measurements
As we step into the practical realm of thickness measurement in vacuum forming, the spotlight now shines on the stage of execution. Like skilled performers, the measurement techniques take center stage, each offering its own unique melody of precision. Let us embark on a guided tour through the process of executing accurate measurements.
A. Step-by-Step Guide for Using Calipers or Micrometers
Prepare the Part: Ensure the vacuum-formed part is clean and free from debris.
Select the Measurement Points: Identify specific locations on the part where you need to measure the thickness of excess material.
Calibrate the Instrument: Calibrate the calipers or micrometers according to manufacturer guidelines.
Measure: Gently close the instrument around the part at the chosen measurement point. Record the reading displayed on the instrument.
Repeat: Perform multiple measurements at different locations to ensure consistency.
Calculate Average: Calculate the average of the measurements to obtain the overall thickness.
B. Procedure for Using Ultrasonic Thickness Gauges
Prepare the Surface: Ensure the surface is clean and free of contaminants that could affect ultrasonic waves.
Apply Couplant: Apply a thin layer of couplant (ultrasonic gel or oil) to the surface. This enhances the transmission of ultrasonic waves.
Position the Probe: Place the ultrasonic thickness gauge probe perpendicular to the surface at the desired measurement point.
Measure: Trigger the device to emit ultrasonic waves. The device calculates thickness based correct temperature and on the time it takes for the wave to travel through the material and return.
Record and Analyze: Record the measurement and repeat at different locations. Analyze the data to ensure consistency.

C. Using Optical Profilometers for Precise Measurements
Prepare the Part: Ensure the part's front surface area is clean and free of any obstructions.
Position the Instrument: Set up the optical profilometer and position it to capture the desired measurement area.
Acquire Data: Initiate data acquisition to create a detailed 3D image of the part's surface.
Analyze the Image: Use the software to analyze the captured image, including thickness and surface features.
Repeat and Validate: Capture multiple images from different angles to ensure accuracy and validate the results.
D. Conducting Cross-Sectional Analysis Effectively
Sample Extraction: Carefully extract a sample section from the vacuum-formed part, ensuring it is representative of the entire part.
Preparation: Prepare the sample for microscopic examination, which may involve embedding, polishing, and coating.
Microscopic Examination: Place the sample under a microscope and carefully measure the thickness at various points.
Analysis: Analyze the measurements and calculate the average thickness.
Interpretation: Interpret the results in the context of the part's design and intended use.
As you traverse the realm of execution, these step-by-step guides act as your compass, ensuring accuracy and consistency in thickness measurements. With each method's melody playing its part, your journey through the vacuum forming process is enriched by the art of precise measurement. In the forthcoming act, we unravel the dance between material variability and measurement accuracy—a dynamic interplay that adds depth to your manufacturing symphony.

Conclusion:
Elevating Manufacturing Through Vacuum Forming
As we draw the curtains on our exploration of vacuum forming and its intricate dance of thickness measurement, we stand witness to a symphony of precision, innovation, and boundless possibilities. The journey through the world of material thickness has unveiled the pivotal role it plays in the structural integrity, functionality, and design of vacuum-formed parts. Let us take a final bow, recapitulating the key factors that orchestrate successful vacuum forming and the profound impact it wields on the manufacturing landscape.
Recap of Key Factors for Successful Vacuum Forming
In the realm of vacuum forming, precision is the guiding star. Accurate thickness measurement emerges as the North Star that guides manufacturers towards the optimal material density, ensuring parts that not only endure the rigors of their environment but also excel in their performance. The delicate interplay of factors such as material thickness, draw ratios, and design intricacies forms the heart of vacuum forming's success story. By choosing the right measurement method, executing accurate measurements, and interpreting the data, manufacturers set the stage for excellence, delivering products that exceed expectations.
The Affordability and Versatility of Vacuum Forming
Vacuum forming stands as a testament to the harmony between innovation and affordability. In a world where manufacturing complexity often accompanies rising costs, vacuum forming offers a refreshing breeze—a cost-effective alternative that doesn't compromise on quality or precision. This affordability extends its embrace across industries, from automotive to packaging, enabling a diverse range of applications to come to life without the burden of excessive expenditures


